Browsed by
Category: Fun with Kids and Grandkids

1 Little Known Petroglyph Site in Utah

1 Little Known Petroglyph Site in Utah

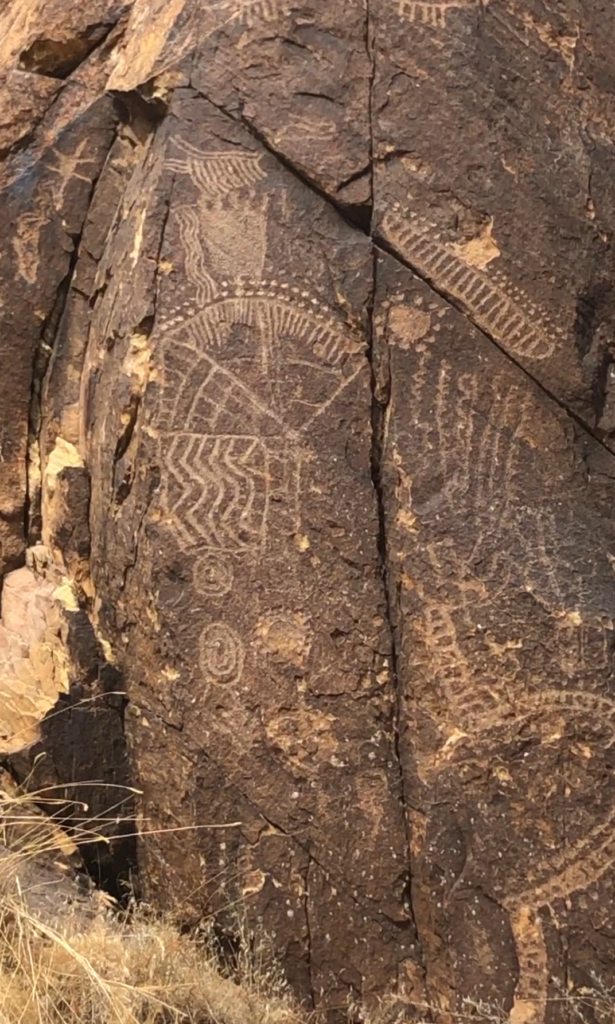
When you travel from the Salt Lake City area on Interstate 15 South towards St. George, UT or Las Vegas, NV you’ll pass through Parowan, UT. Not many people have discovered the Parowan Gap Petroglyphs site, approximately 10.5 miles west of I-15 on the paved Gap Road. These are very distinct and easy to see images. If you enjoy history it’s well worth the stop. Also, it’s a great stop for kids during a long drive.

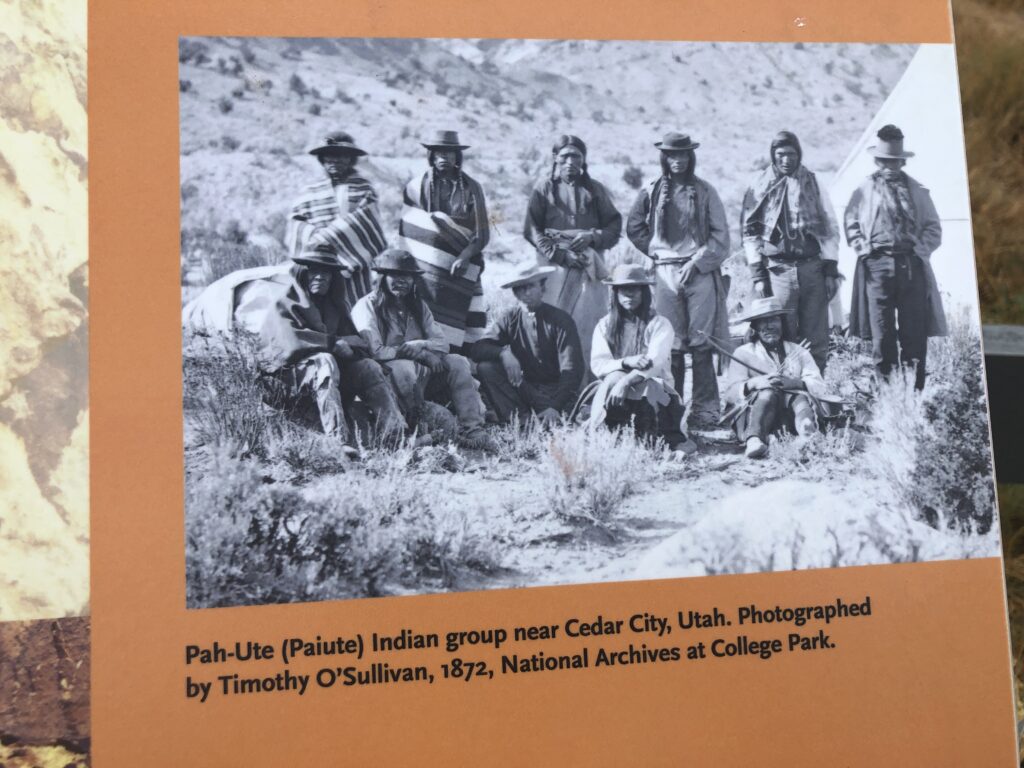
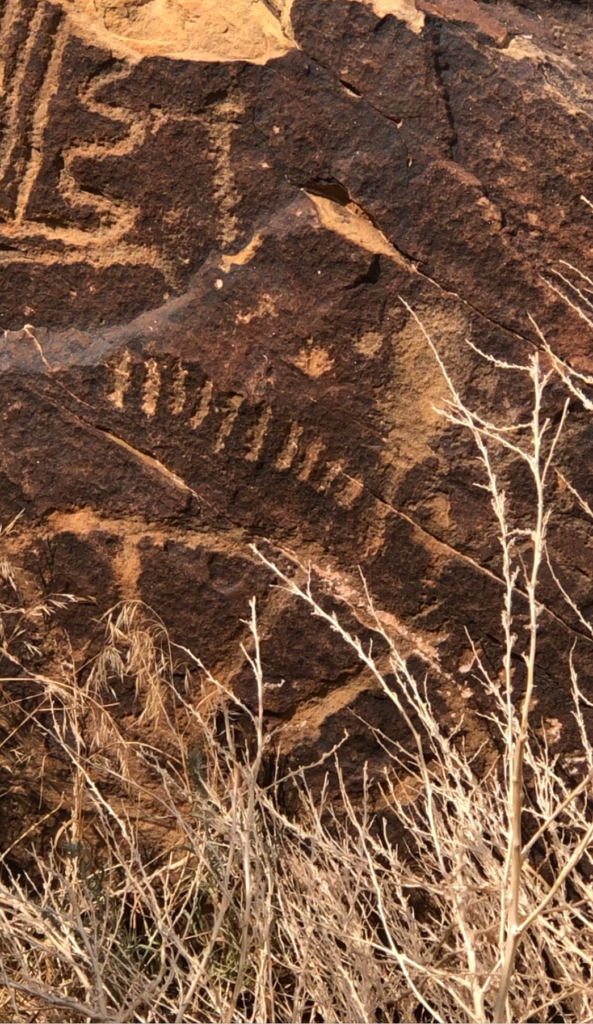
The petroglyphs are carved into sedimentary rock about 15 million years old. According to Utah.com the carvings are thought to be the work of several cultural groups and represent a long period of use by Native cultures several centuries ago. It’s a great are to view evidence of the Ancients who lived in the area 100s of years ago.

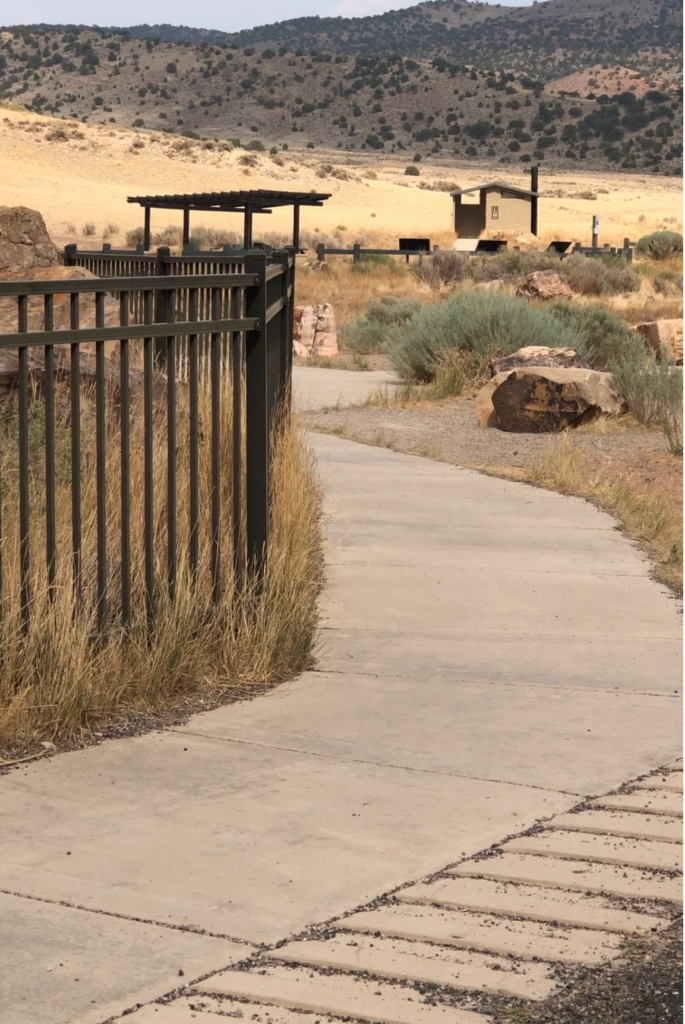
The carvings are behind a short metal fence and very close to the path making them easy to see and photograph. There isn’t shade in the area so be prepared to be in direct sunlight, bring a hat and your own water.

The site has a large gravel parking lot, rustic restroom and picnic area. The area is wheelchair accessible (not the bathroom).

When you’re ready to leave you can return the same way to I-15, or follow UT 130 to I-15 towards Cedar City and St. George.

Photos by John McFadden ©

Parowan Gap Petroglyphs

Hope you enjoy your visit. Subscribe for new posts.

Thanks, John the Free Range Explorer.

3 Reasons to Go Outside

3 Reasons to Go Outside

3 Reasons to start Walking in Nature as part of your exercise routine

  1. You feel better mentally and physically
  2. Walking is a gentle yet effective exercise
  3. Nature is rejuvenating just being in it

https://amp.mindbodygreen.com/articles/heres-why-hiking-is-the-best-workout-for-your-mental-health

3 Reasons to start Walking in Nature as part of your exercise routine..

3 Reasons to start Walking in Nature as part of your exercise routine..

Take a Hike!

As a college student and in my 20’s and 30’s I discovered the joy and peacefulness of hiking.  I started hiking in the nearby woods, then pastures and cliffs above the Northern California Pacific Coast.  Then I expanded to trails in our awesome National Parks.  Needless to say, I was hooked for life.

I found that I could add Photography at the same time.  There are so many places photo subject found on these walks and hikes.  Many are hanging on my and others walls right now.

The greatest benefit is the way I feel when I return home.  I find both my body and mind are refreshed.  I have more energy and stamina, a quieter mind.  Many times solutions to problems and questions I been struggling with now come easily to me.

So, if you want to jumpstart your like, start walking and hiking anywhere you can, in your neighborhood or in nature.

Seventy Years Loving and Helping One Another

Here’s a great article to inspire starting, https://amp.mindbodygreen.com/articles/heres-why-hiking-is-the-best-workout-for-your-mental-health.

See you on the trails, John

This Workout Can Seriously Improve Your Mental Health

Too often when we weigh the benefits of exercise, we tend to focus on the aesthetic. There’s a persistent pressure to exercise to look “good”—to whittle ourselves down to a smaller size and to shape our bodies in a way that pleases someone else. Not only can that mindset be detrimental to our physical health by encouraging destructive habits, but it also takes our attention away from a far superior benefit of exercising: the betterment of our mental health.

Fortunately, the tides are starting to shift (albeit slowly), and more people are beginning to use exercise to improve their mental health—not just as a means to a fitter end. And one of the best workouts for your mental health, as it turns out, is hiking. Here’s why.

How exercise improves your mental health.

If you’ve read anything about the benefits of exercise, there’s a 99.85% chance you’ve come across the word “endorphins.” Yes, those are released through exercising, but there is so much more to unpack when it comes to the positive impact exercise has on our brains.

“Exercise is probably the most underutilized antidepressant,” says Ellen Vora, M.D., a holistic psychiatrist and mindbodygreen Collective member. “It’s been shown in large clinical trials to be just as effective as antidepressants (if not more), and it has benefits like improved sleep, focus, cardiovascular health, and life span.”

There’s also a long list of mental health conditions that exercise can help mitigate, Vora adds, including depression, anxiety, insomnia, ADHD, stress, and bipolar disorder—all of which affect millions of people every year.

Any sort of exercise will, in theory, improve the state of your mental health and make you feel better. But if you can combine the benefits of exercise with the benefits of nature—like going for a hike—that’s when the true healing happens.

How hiking improves your mental health.

Beyond being an enjoyable solo or group activity, hiking combines two of the most potent antidepressants: exercise and nature.

“Nature is critical to our mental health,” Vora says. “Studies have shown that staring at trees and greenery can decrease stress and anxiety and improve your mood.”

And given that many of us spend our days toiling away behind computers and swiping for stimulation on our phones, getting out in nature, Vora notes, is more important for our mental health than ever.

“We as humans evolved while surrounded by and in tune with the natural world. In our modern existence, we’ve gotten so out of touch with that, spending our days in windowless cubicles and staring at screens. This disconnection with nature can make deep parts of ourselves feel alienated and very far from ‘home.'”

Hiking gives us the best of both realms—the natural and physical. As Vora notes, it reconnects us with nature while getting our hearts pumping and causing a burst of serotonin, dopamine, and GABA secretion.

So the next time you’re in need of an all-natural pick-me-up, first tell yourself to (seriously) take a hike, then gather yourself and go for it.

5 Steps to Declutter Your Life

5 Steps to Declutter Your Life

IMG_0628

It’s time to declutter your life and spend more time with the grandkids you love so much.

I found this great article att http://www.lifehack.org/390641/stop-adding-stuff-to-your-life-its-time-to-declutter-your-soul-now

Stop Adding Stuff To Your Life, It’s Time To Declutter Your Soul Now

by

We live in a society that always tells us to get more.

You may be doing this unconsciously, because you’ve always been living this way and that’s your environment.

You’re buying more stuff, which you then need to take care of and fix. You make more friends, but that doesn’t mean you spend time with quality people who lift you up. You consume a lot of information daily, but most of it has nothing to do with your life and goals, and only brings you stress and worries. You add more tasks to your to-do list all the time, but most often you’re just keeping yourself busy, and still not getting the important things done.

Such life is complex. And this complexity makes us overthink, doesn’t let us fall asleep fast, makes us anxious because we are in a rush all the time and try to stay up-to-date.

It’s time to stop doing that.

Simpler is better. Less is what you need more of and it’s the power of eliminating the unnecessary that will let you find more meaning in your days and more happiness in your soul.

Here are some little changes you can make to your lifestyle today that will help you declutter:

1. Analyze how you spend your time and remove unproductive activities.

Keep track of how you spend your time over the course of a few days. Write down everything you do. Then, review these and see what doesn’t give you any results, doesn’t make you happy or help you improve in any way. It’s just pointless to keep doing it.

You may be amazed at how many unproductive things you’re doing daily, without even realizing. That’s why you’ll need to track and review this weekly, to make sure you don’t fall into that trap again.

Soon, you’ll see less events in your calendar, less tasks on your to-do list and more time for the important things.

2. Get rid of belongings you don’t use.

Now let’s move onto the belongings you have.

Be honest with yourself and say what you haven’t used in the last 6 months or so. It doesn’t really matter how precious you think it is, it only takes up space.

If you don’t take control of such possessions, you’ll end up living in the prison of your past, feeling nostalgic every time you look at these objects, and not having the chance to let go. So be ruthless. Give away stuff, sell it, and throw away the rest.

You’re better off without all that burden. Your future self will thank you for doing that, plus it’s a big step of your spiritual journey. You’ll now have more peace of mind, will feel freer than ever and ready to actually go after your goals in life.

3. Keep negativity away.

It’s time to clear your mind now. Negative thoughts don’t have any place there, especially if you want to change yourself and turn your whole life around.

Start small. Notice the negativity in your mind and soul, recognize it, observe it and try to see what causes it. You may journal your thoughts to see some occurring themes. Maybe you’re negative after communicating with someone from your surroundings, or every day after doing a certain thing, or else.

Then, you’ll simply need to remove that or stop doing it to overcome that mental habit.

After that you can start taking charge of what goes in your mind. When you see a negative thought popping up, stop, say no and replace it with a positive one instead.

4. Keep things organized.

Find a place for everything in your home and office and keep it there. When you take it, put it back there.

A simple habit like that is the foundation of your personal organization skills. It will save you a lot of time and worries, you won’t forget where things are and will see a decluttered room and desk every time you enter.

5. Stop saying yes to everything.

Our time is limited. We only have 24 hours in a day. And if we want to work on the things we believe in, but to also have time to rest, have fun and be with our loved ones, we’ll need to prioritize. Stop accepting every proposal you get, don’t start new projects every week, don’t set many goals at once and avoid working on more than one thing at a time.

All this will improve your performance and help you exceed in life, as you’ll only be working on the things that actually matter. You’ll also be happier and will prevent burnout. Adding stuff is never the answer. To get back to your path in life, to see clearly where you’re going and to start having fun and be calm again, you’ll need to remove anything that’s not essential.

Keep only what’s important to you. There’s no time for the rest.

What else can you eliminate today to declutter your soul?

It’s worth it to feel happier.

Thanks for stopping by, John

5 Steps to Building a Tree House – Step 4 and 5

5 Steps to Building a Tree House – Step 4 and 5

Fun-Fun-Fun
Fun-Fun-Fun

After snow and rain delays, our project has morphed into a nearly complete Tree House.

Our fourth step was to complete the building part with walls, supports to make it tight and strong and adding a ladder that anyone from toddlers to grandmas are able to use.  It’s been tested by both and declared “cool”.

Our fifth step was to select the right camo netting that allows the breeze to come through, adds a place to hide, and keeps the littlest ones from falling out.   Then we ordered the slide and waited for it to be shipped.  We went with the 8ft. model to get a good slope and a good ride on the slide.  This slide comes with a hose adapter and place to drill a hole to attach a hose and turn it into a Water slide.  The kids are really excited about that.

Supply Delivery System

Also, we installed a pulley system to deliver treats from the house into the tree house.  We’ll have an old cowboy style dinner bell (the cast iron triangle kind) for them to ring when they need something.  Yes, they’re spoiled.

Interior Decorating
Interior Decorating

Our local grand daughter has already started her interior decorating.  I’m sure every grand child will add their own touch after they arrive this summer. We bought old wooden ammo boxes to store wood scraps (for building and hammering) and they’ve filled one with different size balls (ie. golf balls, a softball).

We’ve told the kids it’s up to them to paint and decorate and add accessories.  Can’t wait to see what they come up with.

It’s been fun planning and building and adapting as it was built.  Now, let’s hope it was worth it.  Although, I’m sure it was.  I got to channel my 10 yr old fort and tree house builder.  We’ll never see it on Tree House Masters TV (that was never the intention), but it will be featured often in family photos.

Thanks for asking for the updates and photos.  Hope you enjoyed coming along with us for the ride.  Thanks, John

5 Steps to Building a Tree House – Step 3, part 2

5 Steps to Building a Tree House – Step 3, part 2


Building the Floor
Building the Floor

The Tree House now has floors.  Notice we cut a generous opening around the tree as it continues to grow and we want to give it lots of room.  Several 2×4 braces are underneath for strength, to prevent sagging and for all around support from wobbling. Don’t want the floors moving like there’s an earthquake when the grand kids are up there. We have braces between the upright 4×4’s and the frame the floor is resting on.

The Walls are going up

There will be walls on two sides.  We’ll cut small “port holes and windows” in them so the shorter/younger kids can peak out.  We’ll let them decide what shape and where they are as we want to get them involved as much as possible. The other sides will be camo mesh netting (we’re testing it, left of the ladder) that doesn’t stretch, we can see threw, and will keep them from falling off the edge.

IMG_2512

1st Porthole
1st Porthole

As with any new project or new build it’s important to get customer and user input along the way to a finished Tree House.  Below, is the first test by our users.  We know we passed all expectation we one of them said, “Grandpa, this is the best tree house in the WORLD!” And to think it’s not even done, lots more little things coming before it’s finished.  Now I’m motivate to make it even better.  We’re working on a slide, and a Supplies (food, treats and tows) Delivery System (SDS), and a cowboy dinner bell. The wooden crate or box with the green splash of paint actually a military surplus ammo box, one of three I got for $4 each.

User Testing
User Testing

Next we’ll add the camo mesh netting, more bracing, a ladder, a bench or two, hopefully a telescope, and the slide (a hose can be connected to make a water slide, shhhsh, don’t tell the kids yet) and more.

Stand by for more, thanks for stopping by, hope it gives you some ideas, thanks, John


5 Steps to Building a Tree House – Step 3, part 1

5 Steps to Building a Tree House – Step 3, part 1


No Grand kids allowed, yet.

Welcome back to our tree house building “documentary” Step 3, Part 1.

The Layout
The Layout

We’ve done all the planning and measuring, now it’s time to begin the work.  First, you want to layout the basic shape to the measurements you made.  We put the pier blocks where the corners are to be and temporarily laid the wood frame.

Pier Blocks
Pier Blocks

We set the pier blocks in sand and leveled them then screwed on our 4×4 s.

Support Posts
Support Posts

This is how we attached the 4x4s for to hold up the floor.

The Frame in Place
The Frame is in Place

Here’s a view looking down on the entire frame for the floor.

The next post will be about installing the floors, then the walls, then the steps or ladder.

Thanks for stopping by, Enjoy, John

5 Steps to Building a Tree House – Step 2

5 Steps to Building a Tree House – Step 2

The Planning Stage
The Planning Stage

Step 2 Planning Stage – This is one of your most important stage.  As I mentioned, for a fun, usable and successful tree house build, many elements need to be considered in the planning stage.  Such as, is it the right tree, will the tree support a structure up in the tree?  If not, you’ll need to build it from the ground and sort of lifting it into the tree.  Also, consider how much room you have, how close are you to your boundry line, how close to the house or property next door, what age and size of people will be using it, what activities do they want to do in it?  Play, spy on things outside of it, have tea parties, play “army”, will they want to camp out and sleep in it, read books, have quiet time, how high off the ground, safety features, how will they get in and out, do you want a slide, a firemans’ pole, a ladder, a ships steering wheel, a periscope, a basket on a pulley to lift things, ie. lunch, into the tree,  a chalkboard, benches, a desk, shelves, a bird house or two, peep holes, port holes, windows -open, plastic, glass.

This would be a good time to choose a theme, such as Pirate, Fairy House, Combat Bunker, Explorers Lookout, Fort, Harry Potter, a Disney movie, or Boys/Girls Club house, Airplane cockpit, Sailing Ship Crows Nest or just about any theme you can imagine or want.

Consider the structure and how it will be built.  What materials will you use?  How strong and sturdy do you want it? Who is going to help you with the heavy lifting? How much will it cost.  And, don’t for get to check local building ordinances for building restrictions.

My first step in Planning was to search the web for tree house examples.  I looked at the type and size of trees used, whether it was built with the ground as the base or was it up in the tree.  I looked at how to get in and out, material used and designs.

Once I had a good idea of what I wanted, I photographed my tree and printed it out.

Tree Photo Drawing
Tree Photo Drawing

Then I was able to draw my design (either on the print with pens, etc. or in a drawing program like Paper 53 for the iPad) right on the photo to see what it will look like.  This made it feel like a real project and I was able to make changes until it was what I wanted.  When it was drawn I was able to show it to family and ask for suggestions and what they thought it should look like.  This was very helpful.  Below, is my first, initial plan.  I’ve made changes since then and expect to make more.

Initial Plan
Initial Plan

After making the initial plan and drawing  I went out to the tree and measured where the structure will actually be.  Then I got out the graph paper and plotted everything out.

Detailed Plan
Detailed Plan

Once the family and everyone agrees as best they can, it’s time to start a budget and supply list, go shopping and get to work.

After that, it’s time to begin the actual building.  Let the fun begin!!

My next post will be about Building It with lots of photos.

Thanks for stopping by, John


5 Steps to Building a Tree House – Step 1

5 Steps to Building a Tree House – Step 1

Family Maple Tree - Winter
Family Maple Tree – Winter

A great activity for vintage Baby Boomers and Boomer Grandpas is to design and build a Tree House with your kids, grand kids and other family members.  It’s a awesome bonding and teaching experience.  I plan on having the little kids do the painting and accessories when it’s time.  That way everyone can be involved.  When it’s finished we’ll have something for the family to use and have fun with for a lifetime.  Here’s my story, sort of a documentation of how we are building it.  Each stage will be a separate post.

Our family is blessed with a beautiful Maple tree in our back yard.  It’s part of our kids’ heritage and memories from growing up around it.  There have been hundreds of picnics, barbecues, tea parties, games of tag, birthday parties, and celebrations under our tree and in its cooling shade in the hot summers.  It shares it’s beauty in each season.  Summer is big green leaves and lots of comforting shade.  Fall is the only season when our tree requires our work or maintenance.  As fall progresses the big green leaves turn orange and then yellow, finally dropping from the branches, landing on the grass.  Here’s where the work comes in, someone, as in Me or our Kids.  I choose the kids for this job as they need to learn to work and care for what we are blessed with, right?  Hear that kids?

You see our tree above after the last snowfall of this winter.

All the snow has melted now and it’s time to build a Tree House

Step 1 Choosing your tree –  In our case we have only one tree to choose from.  By tree house standards this is a small tree which won’t really support much of a structure up in the tree.  So, we decided to build around the tree rather than in the tree.  You’ll need to choose a good strong tree, the right tree, then build the right tree house in or around it.  The formation or structure of the tree will determine the size and elements you will be able to have in your tree house.

That’s Stage 1.  Hope it gives you some ideas to build your own tree house.  Stay tuned for the next stage, Planning Your Tree House coming soon.

Thanks for stopping by, John


Growing Up In The Shade of The Maple Tree

Growing Up In The Shade of The Maple Tree

mapletreegreen
Our Family Maple Tree

When we were young lovers and just married we planted a tiny maple tree in our back yard.  Over the years, it has grown strong and tall.  Our kids have done the same.

This is a short story about our family’s connection and love for our Family Maple Tree.  Hope you feel it and enjoy it.

Maybe you will plant a Family Tree for your family.  Enjoy!

Growing Up In
 The Shade of The Maple Tree

The term Tree of Life comes to mind as I relax under our beautiful, tall and wide-spread maple tree.

It began it’s awesome life as a “start”.   It’s roots and legacy go back to grandma Ida’s yard, who knows where it was before that.

We planted it when we started having our kids some 30 years ago. It’s seen them, and us, go through all stages of life, with the good times and difficult times.  That’s why I call our maple tree The Kids’ Tree or The Family Tree.

All the kids, including our son’s best friend Jason love our tree. Somehow it just makes them happy. Just being around it gives everyone pleasure, comfort, and peace of mind.
Really, it’s given much pleasure to all.  It’s protected us from harsh summer temps. We take hot summer naps in it’s shade and dream of what could be.  There have been large family Bar BQs and plenty of games and family discussions around it.  We feel safe, protected, magical and invincible as it stands over us, so tall.  It encourages us to go outside and sit quietly while we appreciate all we have and the blessings of mother nature.

The Family Maple Tree sheds its leaves in winter, and lets in the crisp blue sky between snow storms. We watch inside from the dinning room as the cold of winter comes and lays down a white blanket of snow all around it.  The mood gets quiet and we listen to the sounds of winter. Every morning we rush to peer out the window to check if there are and animal or bird tracks in the new snow.

The tree has watched us grow into our married, adult roles and watched our babies grow up and have their babies.

It’s girth is bigger now, with yellowish green moss and other signs of aging, just like my wife and I.   I guess that makes it a Grand Tree, just like we are now Grand Parents.

As the bible says, there is a season for everything. Now is the “planting season” for the next generation of kids and Maple Trees. So, I think it’s time for our grand kids to have their own Maple Tree so they too can play in it’s shade and to grow up under it while making memories and Kodak moments of their own.

Today, I think back to seeing that scrawny start of a tree sticking out of the ground, tied to a post for support, not realizing the pleasure it would bring our family through out our lifetime.

Thanks Family Maple Tree and our to kids and their friends for enjoying each other and making a happy family and happy life.
Love, Dad

© John McFadden 2015